Free automatic subtitles in Subtitle Edit
Subtitle Edit is a powerful, free and open-source tool for creating and editing subtitles. One of its best features is generating subtitles automatically from audio using speech recognition. This guide walks you through the exact steps to set it up and start transcribing your videos, with no manual typing.
What you'll need
- Subtitle Edit (latest version)
- An audio or video file you want to subtitle
- About 3 GB of free disk space
- 01
Install Subtitle Edit
Download the latest release from GitHub (link below) and install it.
- 02
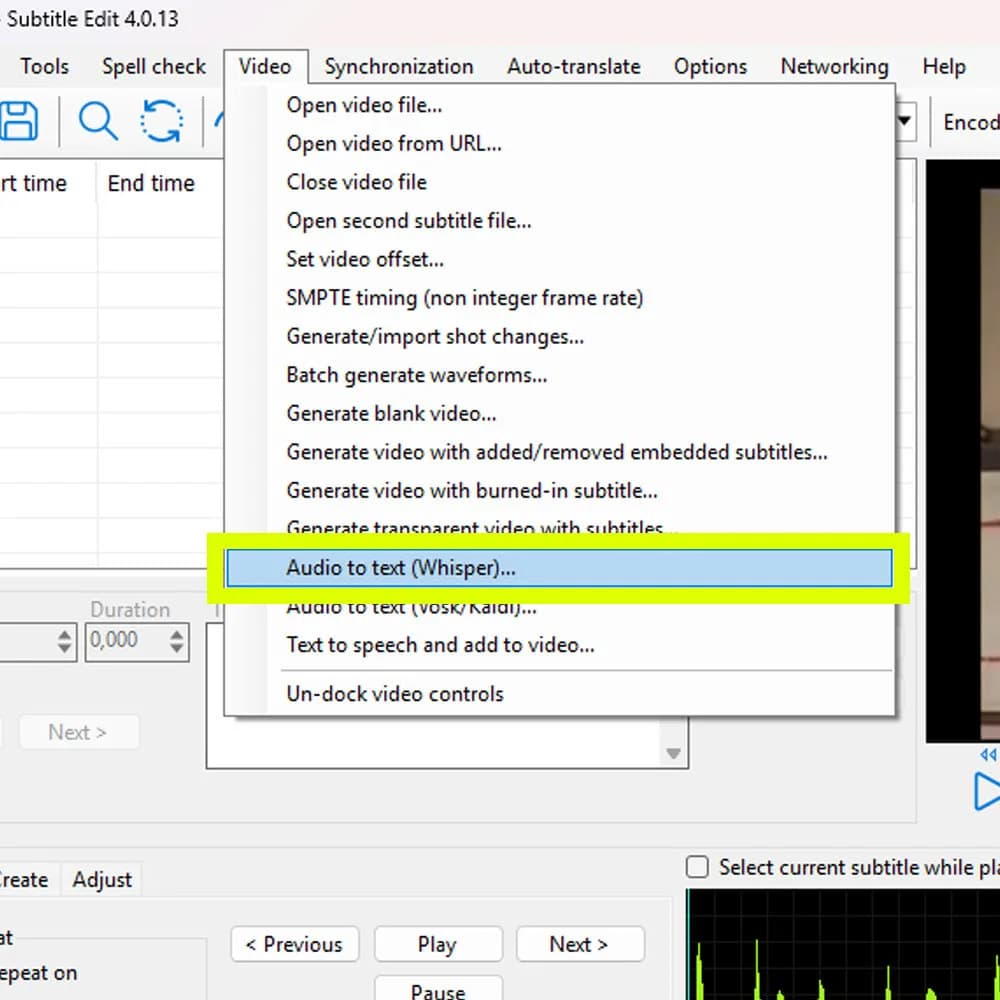
Open Video → Audio to text (Whisper)
- 03
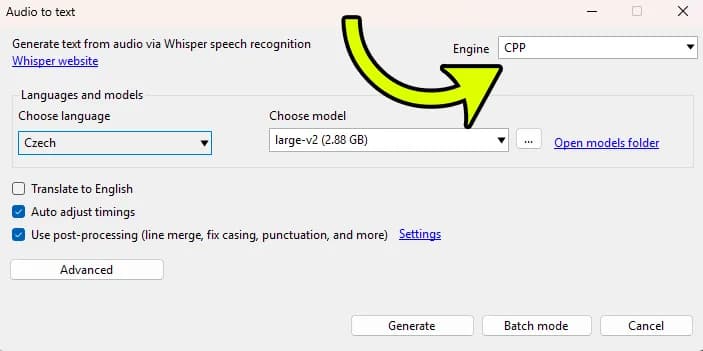
Select the CPP engine
- 04
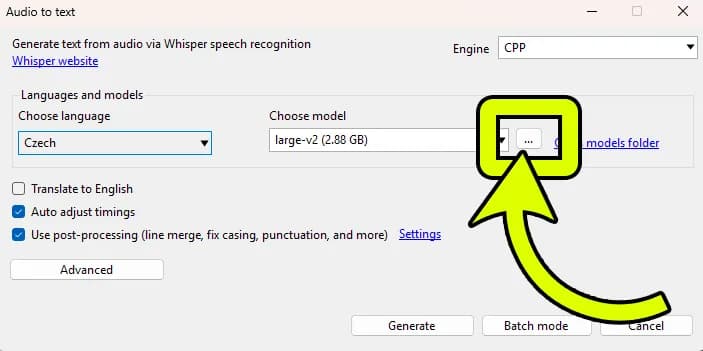
Choose and download a model
Download the large model for the best results.
- 05
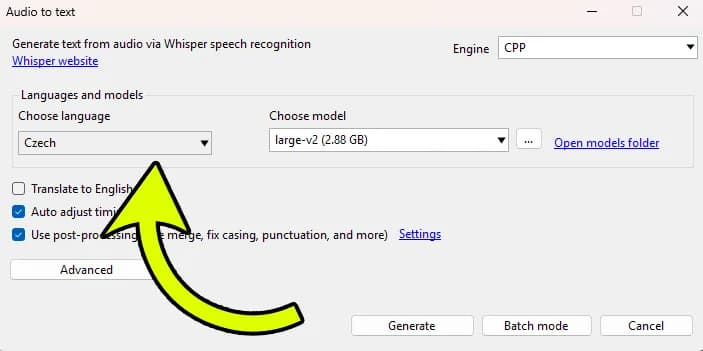
Choose the subtitle language
- 06
Generate the subtitles
If your footage is already loaded, click Generate and wait. If not, close the Audio to text window, click the empty video box and pick your file, then reopen Audio to text (Whisper) from the Video menu and hit Generate. It can take a while depending on your computer and the length of the footage.
- 07
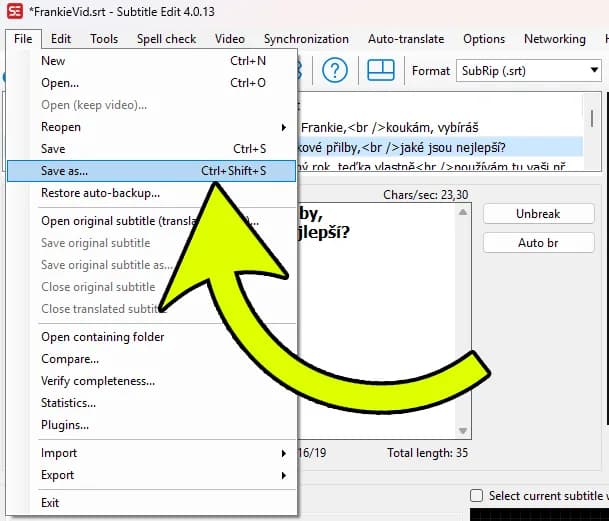
Save your subtitles
To import them into Premiere Pro, for example, use the .srt format.
Final pro tips
- You can customise how subtitle lines are split in the Options tab.
- In Premiere Pro, open the Text panel and use Import to load the saved .srt file.
Need help with video editing or subtitles? Get in touch